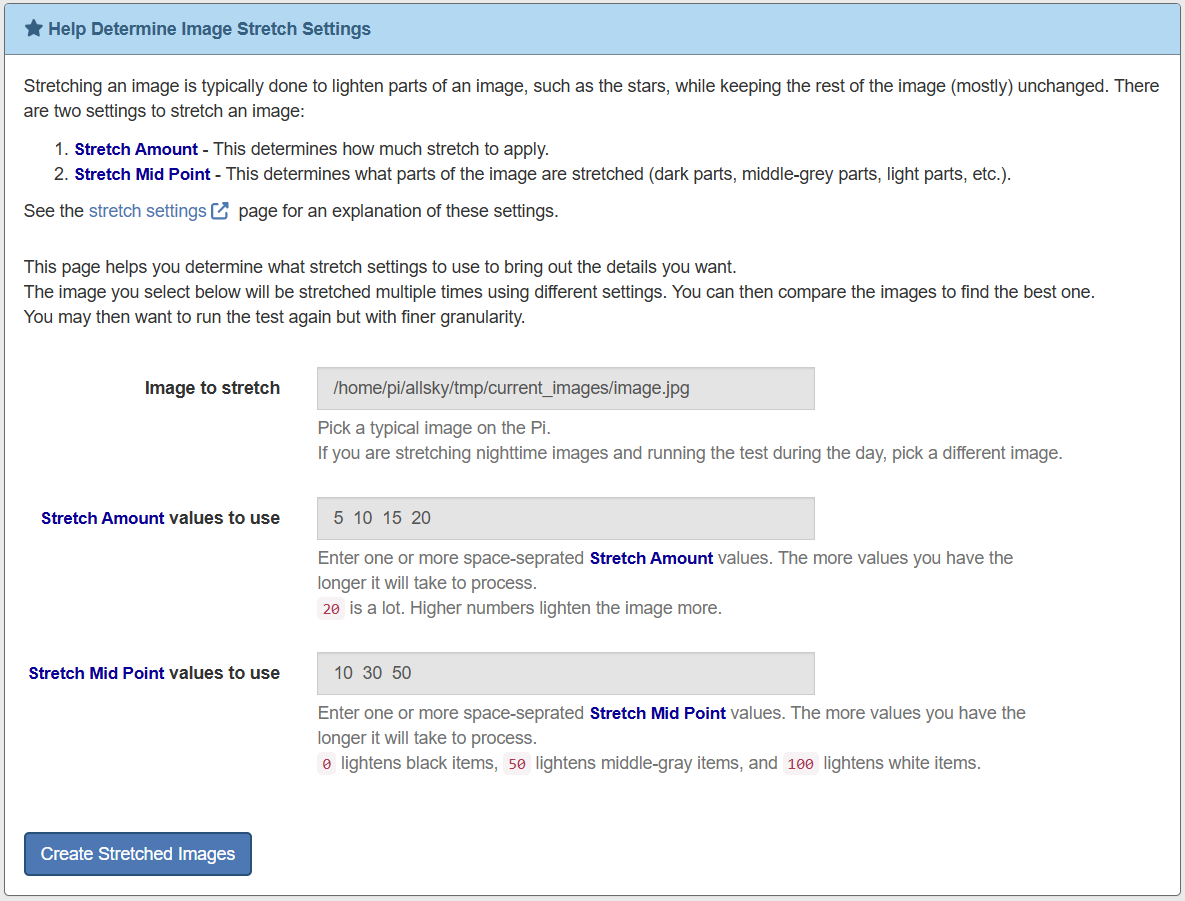
Image Stretch
The Image Stretch helper tool aids you in determining the best settings to stretch an image.
If you want to lighten parts of your image to bring out details you can "stretch" your images. The Stretch Amount setting determines how much of a stretch is applied, and the Stretch Mid Point determines WHERE the stretch is applied - to the dark parts of an image, the mid-gray parts, the light parts, or anything in between. This helper tool allows you to specify multiple settings and then look at the results.
Typical Image Stretch Helper Tool page
The following information is needed:
-
Image to stretch
By default the current image is used. If you are running this tool during the day and want to stretch nighttime images, find a "typical" nighttime image to use.
Warning
If you are already stretching images the tool will display a warning. Find a non-stretched image to use - you don't want to stretch and already stretched image. If you don't have any non-stretched images, temporarily turn stretching off and wait until you have an image, then use it.
- Stretch Amount values to use
This determines how much of a stretch to apply. The default list is a good place to start.
Note that stretching images increases their noise, which you can see in the 4th image below.
- Stretch Mid Point values to use This determines what part of an image is modified. Lower numbers modify darker parts of the image and higher numbers modify lighter parts of the image.
You'll probably want / need to run this tool multiple times. Changes to the Amount are fairly obvious but changes to the Mid Point can be very subtle and often need to be played with.
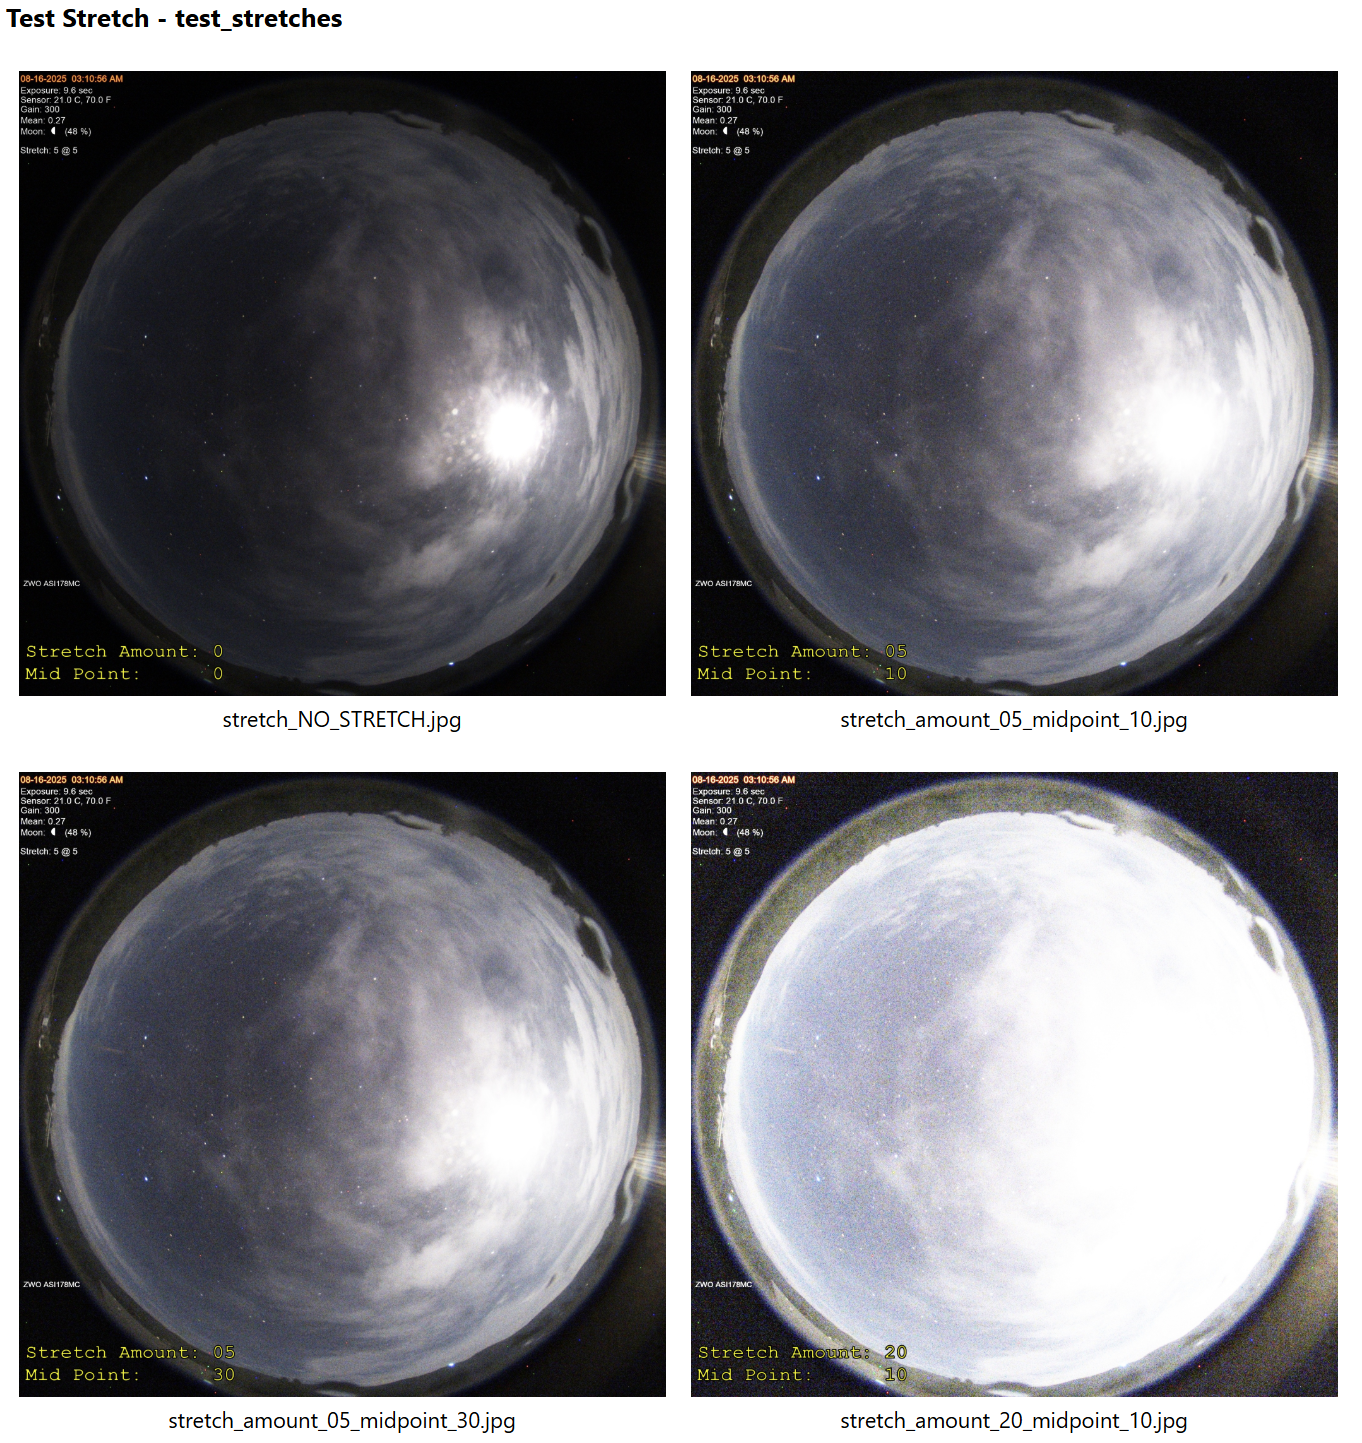
A typical output is shown below.
Note that the first images has no stretch. This is so you can see what the different settings do.
The last image has a Stretch Amount of 20, which is way too much.